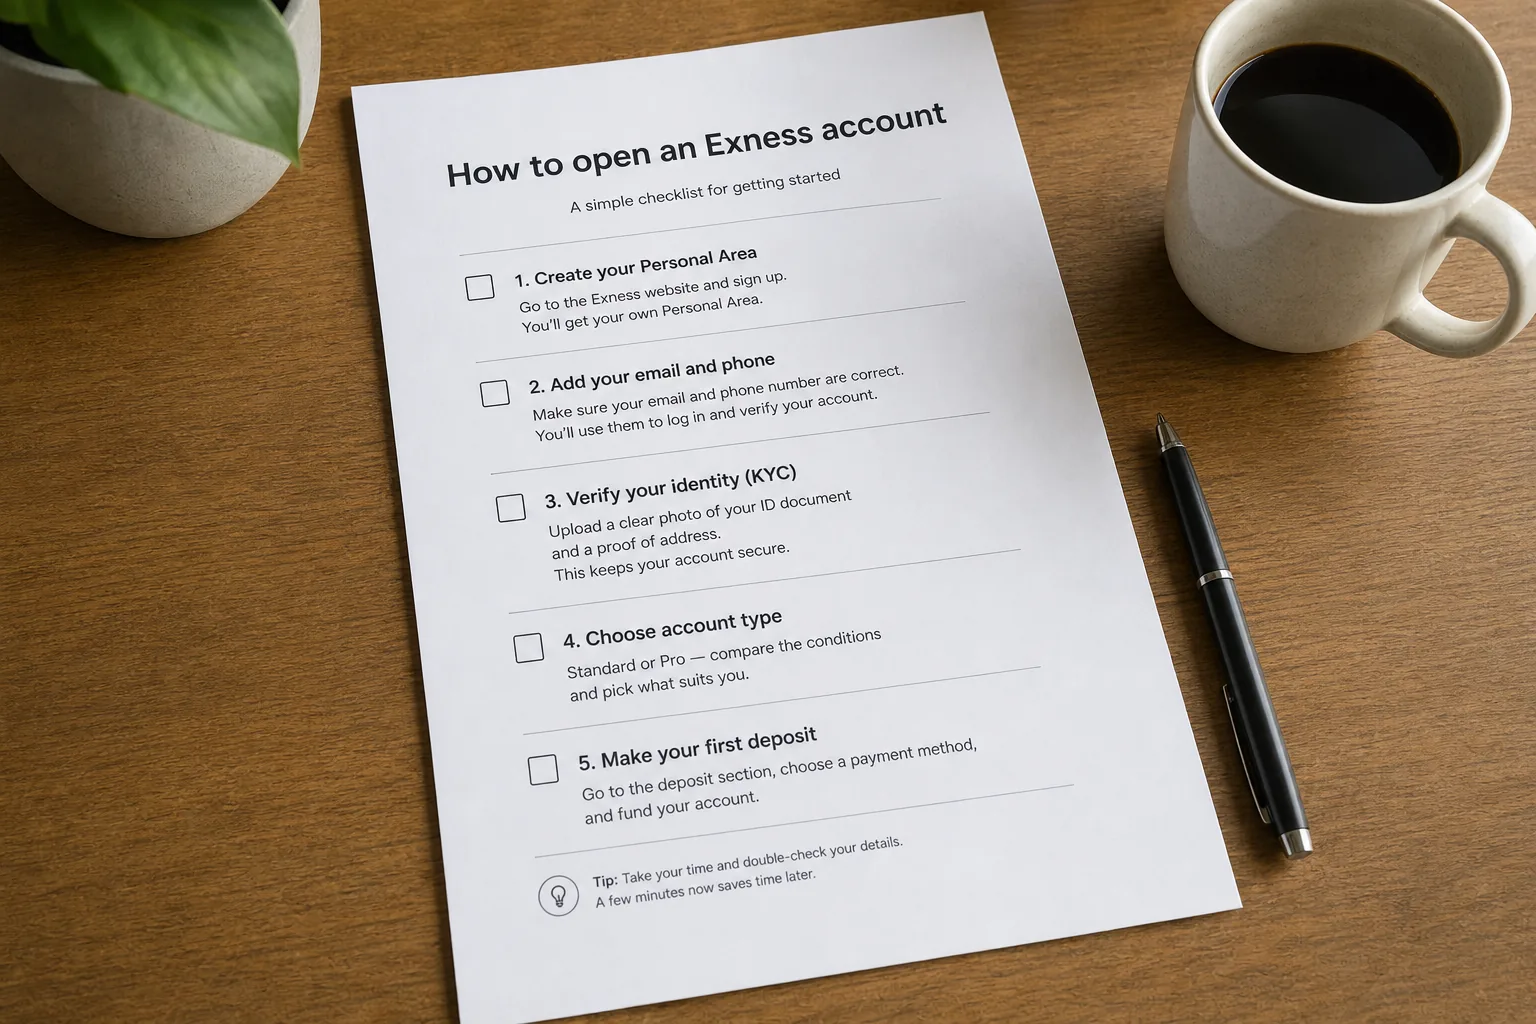
- Confirm your country is eligible before filling any form — restricted residencies including the USA are blocked at onboarding
- Registration is online: country, email, password and phone; Google signup may appear in some flows
- Complete email, phone and KYC before treating the account as fully usable
- Standard is the practical beginner account; official pages list it from $10, while Pro, Raw Spread and Zero generally start from $200
- Exness does not run an XM-style welcome deposit credit as a default global campaign
- Demo first, then a small named-account deposit, then a micro-size live trade with a written stop-loss

Affiliate disclosure: ForexTradeLab may earn a commission from qualifying partner links, without increasing your cost. Read our affiliate disclosure.
Quick Decision Framework#
Short Answer
Use the official Exness site, confirm your country is accepted, register with email or Google, then verify email and phone. Complete KYC with a government photo ID and matching proof of address. After approval, most beginners open Standard, deposit from the listed minimum (often $10 for Standard), and place a small first trade with a stop-loss. Entity, leverage, payments and account tiles depend on residence; some countries, including the USA, are not onboarded.
Detailed Explanation
The profile you create is the Personal Area login, not yet a funded trading account. Typical signup fields are residence country, email, password, phone and consent to terms. KYC usually needs an unexpired photo ID plus recent proof of address in the same country you selected. Standard is listed from $10; professional types such as Pro, Raw Spread and Zero are generally from about $200, with higher regional floors possible. Exness does not apply an XM-style welcome credit by default. MetaTrader login uses a separate account number, password and server from the Personal Area password.
Example
A trader photographs a clear colour passport page and a recent electricity bill, uploads them under the Personal Area file-size limit, then registers on the official site. KYC becomes a short upload instead of a two-day document hunt. A US-resident applicant is blocked at onboarding; that is a different product outcome, not the same Exness account with a cosmetic change.
Common Mistake
Selecting a country that does not match the address document, or using a VPN to look like a supported residence, then stalling KYC or breaching the client agreement.
Professional Tip
Write the legal entity name from the registration or client-agreement screen into your notes on day one. Later leverage, payment rails and complaint routes follow that company, not the brand logo.
TL;DR — Exness Account Opening in One Screen#
| Question | Short Answer |
|---|---|
| How long? | Minutes for the form; KYC depends on documents |
| Documents? | Photo ID + matching proof of address |
| Min deposit? | Standard listed from $10; professional types generally from $200 |
| Best first account? | Standard for most beginners |
| Welcome bonus automatic? | No — do not assume XM-style credit |
| First trade size? | Smallest allowed lot + stop-loss |
| Restricted? | Some countries, including the USA, are not onboarded |
Before You Start: What You Need#
Short Answer
Have ID, proof of address, a working email, a phone number you control, and a strong unused password ready before you click Register.
Detailed Explanation
Most abandoned Exness signups fail for logistics, not for “hard” broker rules:
- Government photo ID — passport, national ID or driver’s licence (unexpired)
- Proof of address — utility bill, bank statement or similar, typically recent, in the same country you will select
- Email you check daily — verification links, security alerts and platform credentials arrive here
- Phone number in your name — Exness commonly asks for SMS or in-app confirmation
- Password — 12+ characters, mixed case; do not reuse another broker password
Also decide whether you will practise on demo first. Demo does not replace KYC, but it prevents funding before you can place a stop-loss without panic. See the Exness demo account guide and the demo to real roadmap.
Example
You photograph a clear colour passport page and a recent electricity bill showing your name and city, save them as JPG/PDF under the file-size limit shown in the Personal Area, then open the official Exness site. KYC becomes a two-minute upload instead of a two-day scavenger hunt.
Common Mistake
Selecting a country on the form that does not match the address document, or using a VPN to look like a supported residence. That mismatch can delay KYC or breach the client agreement.
Professional Tip
Write the legal entity name from the registration or client-agreement screen into your notes on day one. Later leverage, payment rails and complaint routes follow that company, not the brand logo.
Step 1 — Confirm Country Eligibility#
Short Answer
If Exness does not serve your country, stop. Do not invent a different residence to force signup.
Detailed Explanation
Exness routes clients by residency and licensing. Availability can change, and an old blog list is weaker than the live signup flow. The restricted countries guide explains why the USA and some other jurisdictions are blocked, and why entity routing matters for everyone else.
Before you type an email:
- Use the official site, not a cloned domain
- Select your real country of residence
- Read any entity or product warning shown before submit
- If the flow blocks you, treat that as the answer
Example
A trader in an eligible African or Middle Eastern country completes signup and later sees local payment tiles. A US-resident trader is not onboarded. Those are different products, not the same “Exness account” with a cosmetic difference.
Common Mistake
Copying a friend’s screenshot of payment methods or 1:Unlimited leverage. Those features are entity- and status-dependent.
Professional Tip
If you also consider XM, compare eligibility on both sides using XM restricted countries rather than assuming one brand covers every passport.
Step 2 — Register the Profile#
Short Answer
On the official Exness site, register with country, email and password — or Google if that button is shown — then verify email and phone.
Detailed Explanation
The profile you create is the Personal Area login, not yet a funded trading account. Typical fields:
- Country of residence
- Password
- Phone number
- Any consent checkboxes for terms and risk disclosure
Some flows allow Google signup. That still creates an Exness profile that must pass phone and KYC checks before you should deposit serious money.
After submit, open the email and the SMS/app prompt immediately. Unverified contact details are a common reason later withdrawals stall.
Example
You register, confirm the email link within one minute, add your phone, and land in the Personal Area with a prompt to upload documents. That is a complete registration. It is not yet permission to treat the account as fully funded and withdrawable.
Common Mistake
Reusing a password from another broker or emailing the password to “support” on social media. Official help never needs your trading password in a chat.
Professional Tip
Save the Personal Area password and the later MetaTrader password as two different credentials. Mixing them is the most frequent “I cannot log in” ticket after first deposit.
Step 3 — Complete KYC#
Short Answer
Upload identity and residence documents that match the account name and country before you rely on live deposits or withdrawals.
Detailed Explanation
Exness verification is the compliance gate. The dedicated Exness KYC guide covers document quality. In practice:
- Identity document: full page, colour, unexpired, no glare
- Proof of address: recent, same name, same country
- Payment accounts later: your name only
Partial verification can allow some actions and still block larger withdrawals. Do not assume “I deposited, therefore I am fully verified.”
Example
A clear passport scan plus a 30-day-old bank statement in the same name is usually straightforward. A cropped ID selfie in a dark room plus a bill in a parent’s name is a typical reject.
Common Mistake
Depositing first “to skip the paperwork.” Extra checks often appear because of the deposit, not instead of KYC.
Professional Tip
Complete KYC, then make a small deposit, then test a small withdrawal on the same method. That three-step loop is the real onboarding test. Details live in the Exness deposit guide and Exness withdrawal guide.
Step 4 — Choose Account Type#
Short Answer
Open Standard unless you already know why you need Cent, Pro, Raw Spread or Zero.
Detailed Explanation
Exness splits accounts into Standard-style and professional-style pricing. Official Standard pages list a $10 minimum; Pro, Raw Spread and Zero are generally listed from $200. The beginner-focused comparison is best Exness account type for beginners. The full matrix is Exness account types.
| Account | Listed minimum | Cost model | Beginner fit |
|---|---|---|---|
| Standard | $10 | Spread only | Default first live account |
| Standard Cent | $10 where available | Spread only, smaller sizing | Only if shown in your country |
| Pro | Generally $200 | Tighter spread, no commission line | After you can size trades |
| Raw Spread | Generally $200 | Tight quote + commission | Scalpers who record all-in cost |
| Zero | Generally $200 | 0.0 on selected symbols + commission | Pair-focused active traders |
Unlimited or very high leverage, where shown, is conditional. Equity, instrument, history and entity can change it. High leverage is not a beginner feature.
Example
A new trader funds $50 on Standard, trades 0.01 lots on EUR/USD, and records spread during London hours. That is a valid first week. Opening Raw Spread with $200 because the quote shows 0.0 is usually premature.
Common Mistake
Choosing Zero or Raw Spread “because professionals use it.” Commission plus slippage can exceed Standard during your session.
Professional Tip
If you are torn between XM Micro ($5, micro lots) and Exness Standard ($10, spread-only), use XM vs Exness rather than opening both on the same evening with overlapping risk.
Step 5 — Deposit a Test Amount#
Short Answer
Use a method in your own name, start small, and keep the receipt.
Detailed Explanation
Exness payment tiles depend on country, currency, verification status and entity. Cards, local transfers, e-wallets and crypto may appear — or not. The Exness deposit guide and minimum deposit and withdrawal pages explain the operating rules.
Safe funding sequence:
- Confirm verification status in the Personal Area
- Open only the deposit methods shown to you
- Match the name on the card, wallet or bank account
- Deposit a test amount you can afford to lose entirely
- Screenshot the confirmation
Exness often markets fast, automated withdrawals on its side. Final arrival still depends on the payment provider. Choose a method you can also withdraw through.
Example
You deposit $20 via a local method in your name, see it in the Personal Area, and later withdraw $10 on the same rail. That test tells you more than any review screenshot.
Common Mistake
Funding from a friend’s card or a business account that does not match KYC. Name mismatch is a leading cause of frozen payouts across retail FX, not only at Exness.
Professional Tip
If your country has weak card success rates, look for local tiles before retrying the same international card three times. Repeated failed deposits can trigger extra checks.
Step 6 — Set Up the Platform and Place a Controlled First Trade#
Short Answer
Download MT4 or MT5 from the Personal Area, log in with the issued credentials, and place a tiny trade with a stop-loss.
Detailed Explanation
Exness commonly supports MetaTrader 4, MetaTrader 5 and its own terminal/app. Installers must come from the Personal Area or the broker’s official download pages — not a random APK.
After login:
- Confirm server and account number match the email
- Open symbol specification for contract size and minimum volume
- Calculate lot size from cash risk, not from “0.10 looks serious”
- Place a stop-loss on the first order
- Journal the spread at fill
Use the position size calculator guide and forex risk management before increasing size. The Exness MT4 setup page covers the MetaTrader path.
Example
On a $100 Standard account, a 30-pip EUR/USD stop at 0.01 lot is about $3 of planned risk — already 3% if that is your only capital. That is why Standard Cent, where available, or a larger cash buffer, matters more than the brand name.
Common Mistake
Turning on the highest leverage shown and doubling the lot “because the margin requirement looks cheap.” Margin is collateral, not a loss cap. See the glossary definitions of margin and leverage.
Professional Tip
Do not scale until you have one clean deposit and one clean withdrawal. A broker that fills orders but cannot return $10 is not a broker you should add capital to.
After You Are Live: First-Week Plan#
Treat the first seven days as operations, not income:
- Day 1 — entity name, account type and KYC status written down
- Day 2 — demo or minimum live charts; record spreads in your session
- Day 3 — one minimum-size trade with stop-loss
- Day 4 — one support question about your payment method
- Day 5 — export a statement
- Day 6 — small withdrawal test if you deposited
- Day 7 — decide to continue, switch account type, or stay on demo
This is the same discipline in the demo to real guide. Skipping it is how “fast broker” stories turn into “I cannot withdraw” tickets.
XM or Exness — When to Open Which#
| If you need… | Usually start with |
|---|---|
| $5 entry, Micro lots, eligible welcome tile | XM account opening walkthrough |
| Spread-only Standard from $10, fast payout workflow | This Exness guide |
| Still unsure | Open-account checklist then XM vs Exness |
Do not open two live accounts on the same day and fund both with money you cannot afford to lose. One verified path beats two half-finished profiles.
Common Account-Opening Mistakes#
- Using a non-official URL or a “manager” who asks for remote access
- Country or name mismatch on KYC and payments
- Depositing before verification
- Choosing Raw/Zero on day one for the 0.0 headline
- Assuming a welcome bonus exists because XM has one
- Trading gold or indices with EUR/USD risk assumptions
- Skipping the withdrawal test
Pre-Deposit Checklist#
- I confirmed Exness accepts my country on the official flow
- I know the legal entity on the client agreement
- Email and phone are verified
- KYC documents match name and country
- I chose Standard (or Cent if available and needed)
- My first deposit is a test amount I can lose
- Payment method is in my own name
- I have a written max loss per trade in dollars
- I will download the platform only from Exness
- I will test a small withdrawal before adding funds
If several of those lines are still blank, stay on demo.
Glossary#
| Term | Meaning |
|---|---|
| Personal Area | Exness web portal for documents, funding, accounts and downloads |
| KYC | Know Your Customer — identity and address verification |
| Standard account | Spread-only live account; official pages list from $10 |
| Professional accounts | Pro, Raw Spread and Zero; generally higher minimums and different cost models |
| Legal entity | The regulated company named in your client agreement |
| Same-name payment | Deposit and withdrawal accounts must match the verified client name |
Key Takeaways#
- Exness opening is eligibility + verification + a named payment method, not a secret form trick
- Standard + small size + stop-loss is the responsible first live path for most beginners
- Bonuses are not the reason to choose Exness; check the Personal Area and ignore third-party “free credit” claims
- Scale only after a clean small deposit and a clean small withdrawal test
- If XM’s $5 Micro path fits you better, use the XM walkthrough instead of forcing Exness
Related Reading#
- Best Exness account type for beginners
- Exness account types
- Exness account verification and KYC
- Exness deposit guide
- Exness withdrawal
- Exness restricted countries
- Exness demo to real
- Exness review 2026
- XM vs Exness
- How to open an XM account
- How to switch forex brokers
- Open forex trading account checklist
Practical next step: confirm country eligibility and account type first, then review live Exness terms. Open Exness terms only after you understand CFD risk, KYC and payment-name rules. Fund only capital you can afford to lose.
Comments
Add a useful note for other traders. We review comments before publishing.